Introduction to Digital Photography
Manual Mode
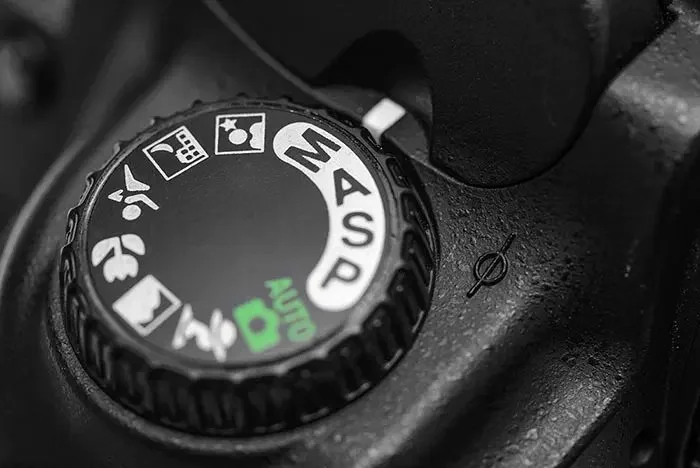
“Real photographers use manual mode”. . it’s true. If you're shooting in other modes (automatic, aperture priority, etc) then you are allowing the camera to make creative decisions for you. In other words, your creative ability is limited. Therefore, it is critical to control the amount of light that the camera captures to maximize your creative vision.
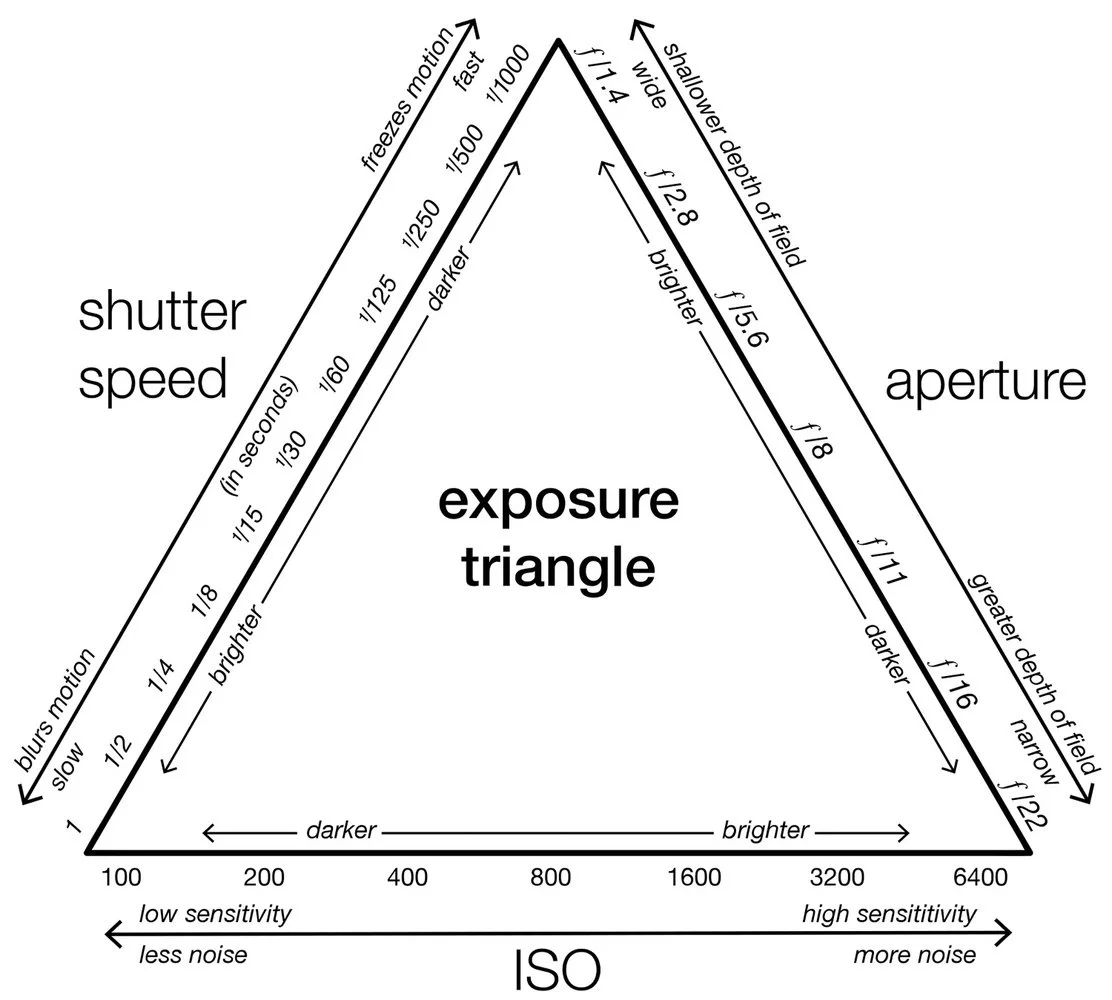
The exposure triangle is a fundamental concept in photography that explains how the three critical elements of manual mode—aperture, shutter speed, and ISO—interact with each other and determine the overall exposure of a photograph. Understanding and manipulating these elements allows photographers to achieve the desired depth of field, motion blur, and noise of their image. Before we continue on how manual mode works, let's first establish the three variables beginning with aperture:
Aperture
If you googled the word “aperture”, you will find that it literally means “opening” or “hole”. The aperture of a camera's lens is a circular opening that regulates the amount of light that hits the camera's sensor.
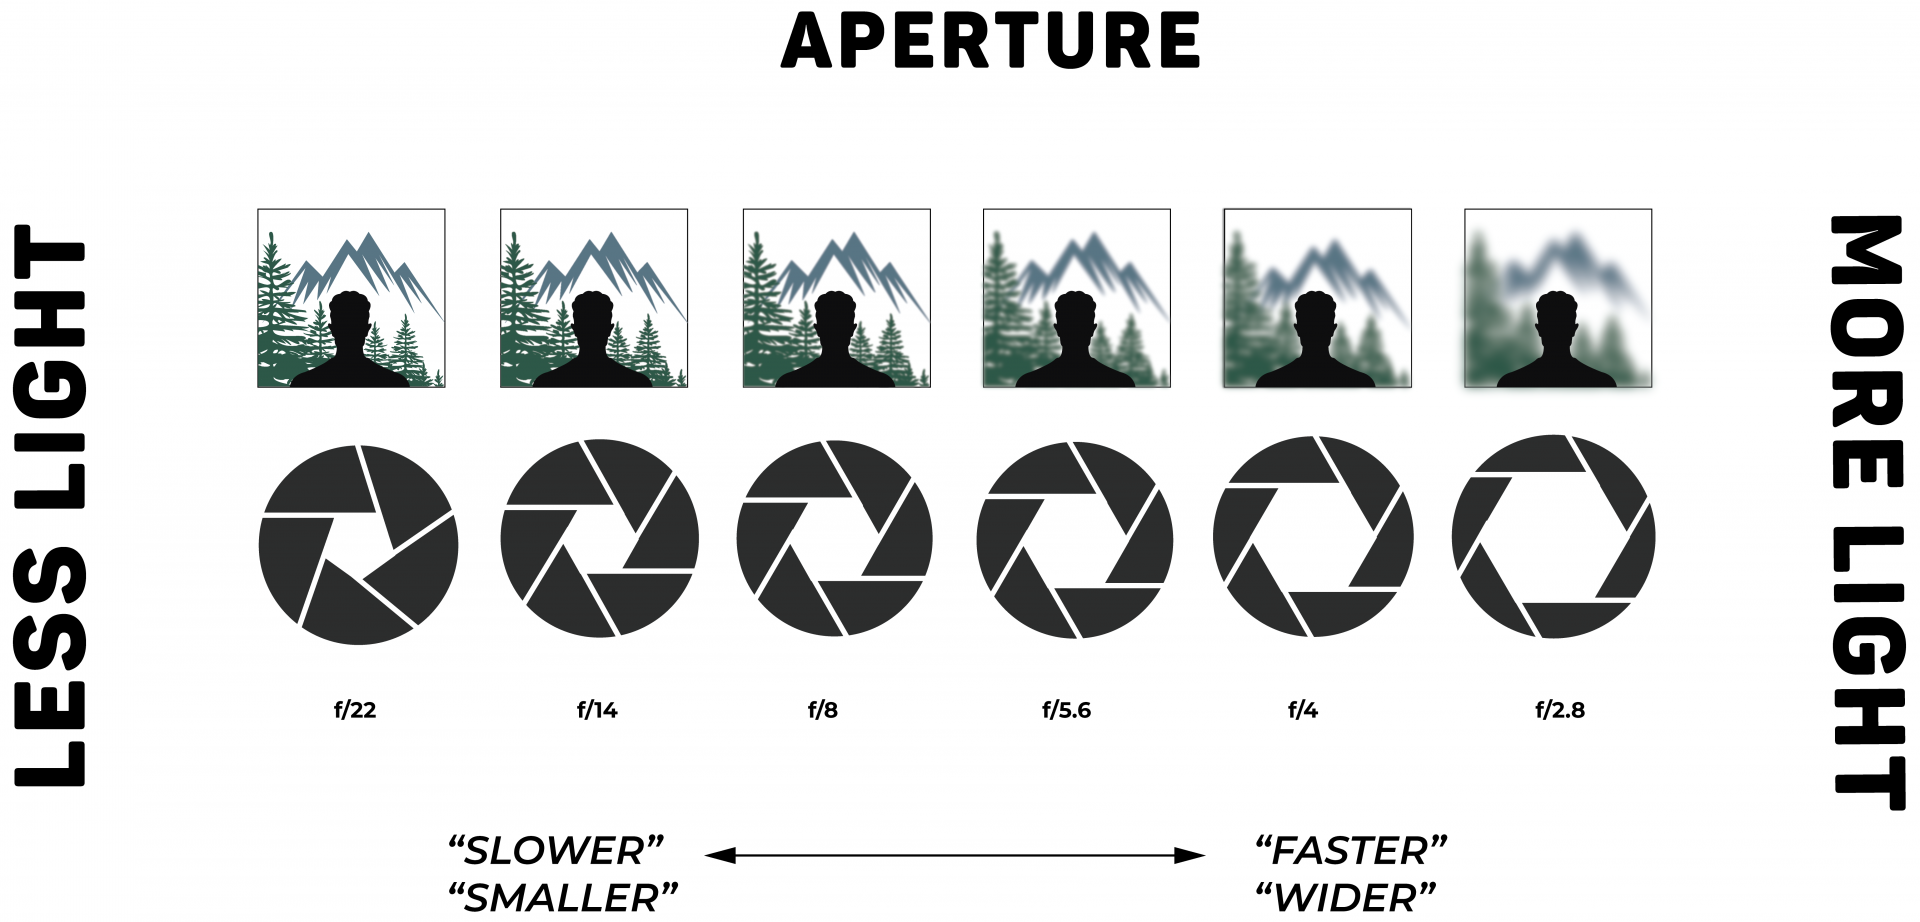
The width of the aperture is measured in f/stops. The most common f/stops are f/2.8, f/4, f/5.6, f/8, f/11,f/16 and f/22. The type of lens you have will determine which f-stops are available for you to use.
Small apertures like f/22, let in very little light. Small apertures create a wide depth of field. This means that everything within the frame will be in focus. Wide depth of field best used for landscape and establishing images.
On the opposite side, large apertures like f/2.8, let in a lot of light. Large apertures create a shallow depth of fields. A shallow depth of field isolates objects and is great for portrait photography.
Medium apertures like f/8, creates a medium depth of field. This is when the foreground is in focus and the background is slightly out of focus. Medium apertures are great for when the main subject is not entirely isolated from its surroundings.
The aperture setting does not only determine the amount of light that passes through a lens to the camera’s sensor but it also determines the depth of field. Luckily it isn't up to aperture alone to create a proper exposure, aperture works in conjunction with Shutter Speed.
Shutter Speed
The shutter lives on the camera's body, in between the aperture and the camera's sensor. Its main goal is to block light from reaching the sensor. It remains open for a predetermined amount of time before shutting and is repeated various times per second. The amount of time it opens and closes per second is known as the shutter speed.
When a camera’s shutter button is pressed the aperture opens. The length of time the aperture remains open is determined by the camera's shutter speed. In other words, the shutter speed determines how long the camera’s sensor will be exposed to light.
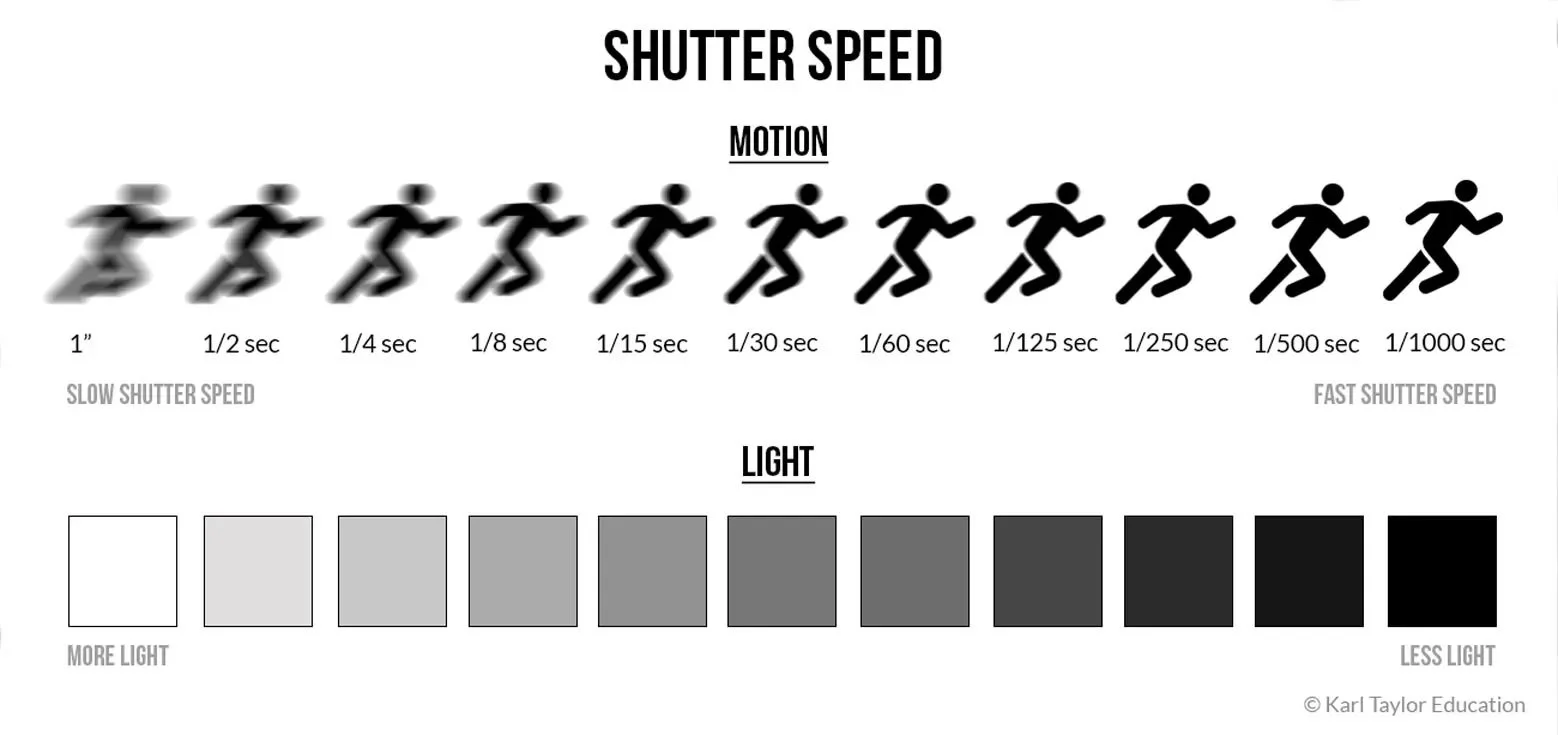
The speed of a single shutter is measured in fractions of a second. As an example, the shutter speed of 1/125 means that the shutter will remain open for one hundred and twenty five seconds. The longer the shutter is, the more light will reach the sensor. The shorter the shutter is, less light will reach the sensor.
Like aperture, how long the shutter speed is does not only affect the amount of light that is exposed to the sensor. It also affects motion blur. The slower the shutter speed is, say 1/15, the more motion blur will be prominent in an image when capturing a moving object or even the camera itself is moving. Fast shutter speeds, like 1/500, freeze objects in motion with crisp clarity.
Once light enters a camera's lens, it passes through the aperture for a specific amount of time set by the shutter speed. It ultimately reaches the sensor of a digital camera. The sensitivity of this sensor to light is governed by the next variable – ISO.
ISO
ISO determines the sensitivity level a digital camera’s sensor is to light. With film cameras, ISO would note a film rolls sensitivity to light. Once a roll is in the camera ISO was a stable variable unable to be changed until that roll was finished or replaced. With DSLR cameras, the sensor's sensitivity level can be adjusted at any given moment to match the availability of light.
ISO is measured in values such as 100, 200, 400, 800, 1600, 3200, and so on. ISO 100 is a low value that means the sensor is less sensitive to light. ISO 3200 is a high value that makes the sensor more sensitive to light.
The saying that ‘more isn't always better’ is very true when it comes to ISO. Relying on ISO to brighten an image comes at the cost of electronic noise. Noise is a random variation of brightness or color information in an image. Intentionally adding noise to an image can be a stylistic choice, however large amounts of noise can be read as low quality and unprofessional.
Ideally every image captured would be taken with a low ISO 100 in order to maintain the image quality in smoothness, contrast, and color rendition. But let's be realistic, your settings will be determined on how much light is available to you. So let's review how you can properly expose an image during common lighting situations using all three variables in the exposure triangle.
Using Manual Mode to Exposing for Too Much Light
Imagine it's a bright sunny day with no clouds in sight. You are outside at noon and there is a lot of available light. This is great, except your images are overexposed which causes you to lose detail. What do you do? You change your camera settings to the Sunny 16 Rule. The Sunny 16 Rule is as follows:
Aperture: Use a large aperture starting at f/16. Choosing a high f/stop minimizes the amount of light that enters through your lens.
Shutter Speed: Use a fast shutter speed, around 1/1100 or higher. Using a fast shutter speed will limit the time light can reach the sensor.
ISO: Lower your ISO as much as possible. This usually means ISO 100 or lower. This will make your sensor less sensitive to the light.
If your image is still overexposed, continue to use a larger aperture and increase the shutter speed. However if the light is too harsh, you may need to use an ND Filter (think of it as sunglasses for your camera). This will allow you to widen your aperture without overexposing your image.
Using Manual Mode to Expose for Low Light Settings
Now imagine your outside and the sun just set behind the horizon. Most of the light is gone but you still want to continue capturing images. To
Aperture: Use the smallest aperture available to you like f/2.8. This will allow as much light as possible to enter through your lens.
Shutter Speed: Use a slow shutter speed, around 1/15 or lower. This will allow more time for light to enter to reach the sensor.
ISO: Use a high ISO like 1600 or higher. This will make the sensor more sensitive to the dim light.
If your image begins to blur too much due to the slow shutter speed. Then you may need a Tripod to help keep the camera stable while it is in the process of capturing an image.
Practice, Practice, Practice
The best way to truly understand and master manual mode and the exposure triangle is by actively going out and shooting. Photography, like any other skill, improves significantly with hands-on practice. Each shot you take allows you to experiment with different settings—adjusting the aperture, shutter speed, and ISO to see how they interact and affect the final image. Over time, this trial and error will deepen your understanding of how to manipulate these elements to achieve the desired visual effect, regardless of the lighting conditions. There's no substitute for practice, practice, practice! Grab your camera, explore various environments and scenarios, and watch as your proficiency and confidence grow with each click of the shutter.
Begin practicing now with this manual mode camera simulator


